
Cutting wood at an angle seems simple on paper, but even the slightest deviation of a few degrees results in a joint that doesn’t fit or a molding that gaps. Bevel cuts, whether mitered or beveled, require precise marking, the right tool, and a reliable guiding method. This article examines the technical factors that determine the success of these cuts.
Stabilizing the piece before cutting at an angle: the underestimated factor
The majority of failed bevel cuts do not stem from the blade or angle adjustment. They arise from the fact that the piece has moved, even imperceptibly, during the blade’s passage. On a straight cut at 90°, the wood naturally rests against the guide. On a bevel cut, the lateral component of the blade pushes the piece in a direction that the guide does not always compensate for.
There are two practical solutions. The first is to use quick-release clamps positioned as close to the cutting line as possible, never more than a few centimeters away.
The second, more repeatable solution involves creating a holding jig. On a table saw, a wedge-shaped jig placed between the parallel guide and the piece allows for the same angle to be reproduced over dozens of successive cuts. This principle has been documented by carpenters faced with cutting trapezoidal strips in series, where the jig fixed to the piece prevents any rotation during cutting.
For those looking to delve deeper into how to cut wood at an angle with different types of saws, the choice of holding system remains the first parameter to master even before discussing blade or angle.

Dive saw and guide rail: the long bevel cut
For bevel cuts on long pieces (boards, beams, countertops), the dive saw combined with a guide rail offers a level of precision that is difficult to achieve otherwise. Manufacturers like Festool have developed rails specifically designed for angle cuts, with stops and integrated graduations that allow for quick adjustment of a repeatable angle.
The rail is fixed to the piece using clamps or non-slip strips. The saw glides along the rail with no possibility of lateral deviation. This system eliminates the main problem of freehand cutting: the blade follows a path imposed by the rail, not by the hand.
What the rail does not solve
The rail manages the horizontal trajectory, but not the inclination of the blade. For a compound bevel (angle in two planes simultaneously), it is necessary to combine the inclination of the saw’s base with the angle of the rail relative to the edge of the piece. This double configuration requires prior marking on both faces of the wood and a check with a square before starting the cut.
Field reports vary on the ease of achieving a clean compound bevel with a dive saw. On softwoods like spruce, the margin of error remains acceptable. On hardwoods or exotic woods, any hesitation in the feed creates a visible burn on the cut face.
Miter saw: fine adjustment and common pitfalls
The miter saw (radial) is the most common tool for short bevel cuts: baseboards, frames, moldings, rafters. Its pivoting table allows for angle selection, and on models with tilt, for combining miter and bevel.
The most frequent pitfall concerns calibration. The graduation printed on the miter saw’s table is not always reliable, especially on entry-level models. A discrepancy of one to two degrees between the displayed angle and the actual cutting angle is common. Verification is done with a square set to the desired angle, placed against the blade (machine unplugged) and the table.
- Check the perpendicularity of the blade to the table at 0° before any angle adjustment, using a precision square
- Secure the piece with the integrated clamp on the saw, never by hand, as the rotation of the blade tends to project small offcuts
- For 45° miter cuts for a frame, cut both complementary pieces in the same session without changing the setting, then check the dry fit before gluing
A detail rarely mentioned: the thickness of the cut line (the kerf) modifies the final angle on narrow pieces. On a narrow molding, the few millimeters removed by the blade can offset the joint. Some carpenters compensate by marking the cut line on the waste side and positioning the blade so that its teeth only bite into the part to be removed.
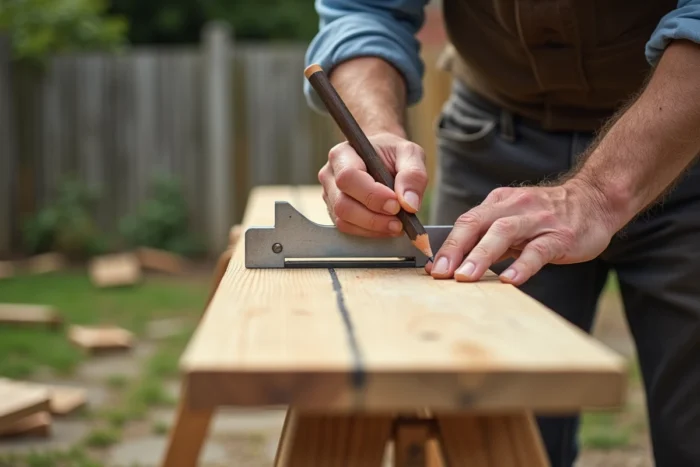
Marking and blade choice for clean bevel cuts
Marking is everything. On a bevel cut, marking with a pencil on one face is not enough: the line must be transferred to the opposite face and to the edge to visually verify that the blade follows the correct path through the thickness of the wood. The square (or bevel gauge) is the appropriate marking tool. It is set to the desired angle and allows for reproducing that same angle on each piece.
Blade and tooth design suitable for bevels
A bevel cut crosses the wood fibers at an angle that stresses the blade differently than a straight cut. The number of teeth plays a direct role in the quality of the surface.
- For finishing bevel cuts (moldings, baseboards, frames), a blade with a high number of teeth reduces tear-out on the exit face
- For structural bevel cuts (rafters, joists), a blade with a more aggressive tooth design is sufficient and avoids overheating in resinous woods
- On laminated or veneered woods, placing a masking tape on the cut line before cutting limits veneer tear-out
A consistent feed rate is as important as the choice of blade. Pushing too fast causes vibrations that deviate the cut. Pushing too slowly on resinous wood burns the surface.
Wood dust and repeated bevel cuts: a risk to consider
Bevel cuts often generate more fine dust than straight cuts because the contact surface between the blade and the wood is larger. The Labor Code (Article R.4412-149) mandates source capture measures for wood dust, particularly on circular saws and miter saws used repeatedly.
For workshop use, even amateur, connecting the saw to a shop vacuum significantly reduces exposure. Recent models of miter saws integrate dust extraction ports directly onto the blade guard. On dive saws with rails, the dust collection system is often integrated into the rail itself.
Ultimately, mastering bevel cuts relies on three pillars rarely combined successfully at first: a rigid hold on the piece, a calibrated and verified tool, and marking transferred to multiple faces. The rest is practice on offcuts before working on the final piece.